
Introduction
I’ve been using mechanical keyboards for about 5 years now, but I’ve never built one myself. I’ve had many non-mechanical keyboard sets from Microsoft or Logitech in the past, and a lot of generic keyboards that usually come with the PC. They were serviceable, but not a great experience, so basically a consumable to be replaced when it broke.
In this article, I will go through some of the previous mechanical keyboards I’ve used, and how I built and customized a mechanical keyboard for workplace use, making it as quiet as possible.
Background
Back in 2016 I was working at a local Internet Service Provider, and my boss gave me an HP Omen 1100 mechanical keyboard to use:
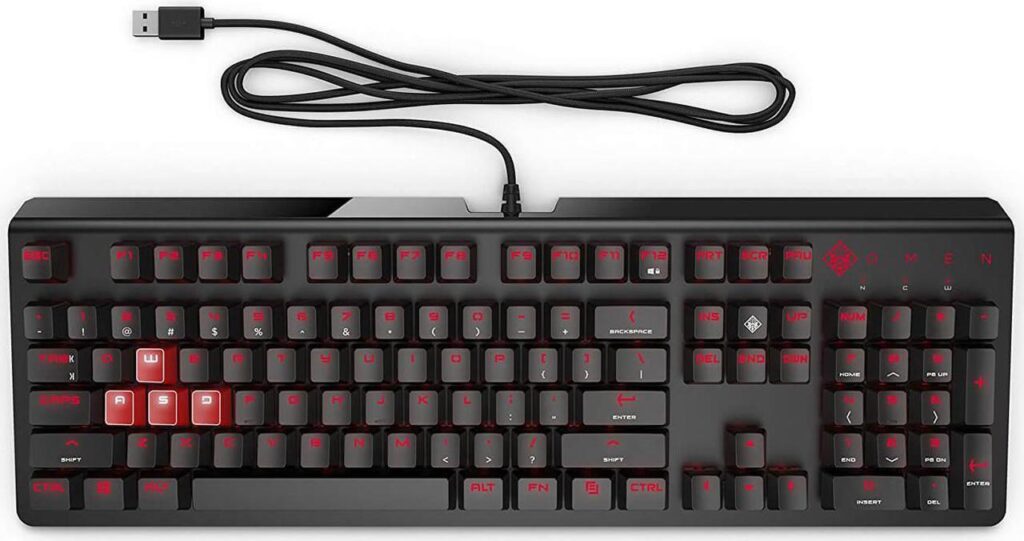
This was a gaming-style mechanical keyboard with Cherry MX Blue switches, which are quite loud and clacky. I had never used a mechanical keyboard before, but I enjoyed the additional tactile feedback from the keys, and found the sound quite satisfying while typing.
Unfortunately after a week or so, I had received multiple requests from teammates nearby asking me to switch to something else because of how loud it was and how fast I was typing on it 😅. I ended up switching back to a generic non-mechanical keyboard at work, to the relief of my co-workers.
I ended up searching around to upgrade my keyboard at home, and bought a Das Keyboard 4 Ultimate keyboard with Cherry MX Blue switches:
The keyboard is quite heavy, and the base is completely aluminum. The version I bought had blank keycaps, which took a bit of getting used to. I used it for about 7 years straight until I had worn the keycaps shiny and smooth:
This was my main keyboard at home for gaming and coding, which is downstairs near my servers, so it is already quite loud, and the clacking of the keys didn’t bother anyone.
I eventually bought a replacement GMK White-On-Black ABS keycap set from Drop.com, and spent an evening pulling off all the keycaps, cleaning the entire keyboard out, and replacing the keycaps with a new set. It’s still going strong.
During the pandemic, I set up a work area in a spare bedroom for my company laptop with a docking station, as well as a personal computer on the side. I bought a Leopold FC750R TKL mechanical keyboard with Cherry MX Blue switches for my side computer. This was a fully assembled mechanical keyboard that I bought from MechanicalKeyboards.com
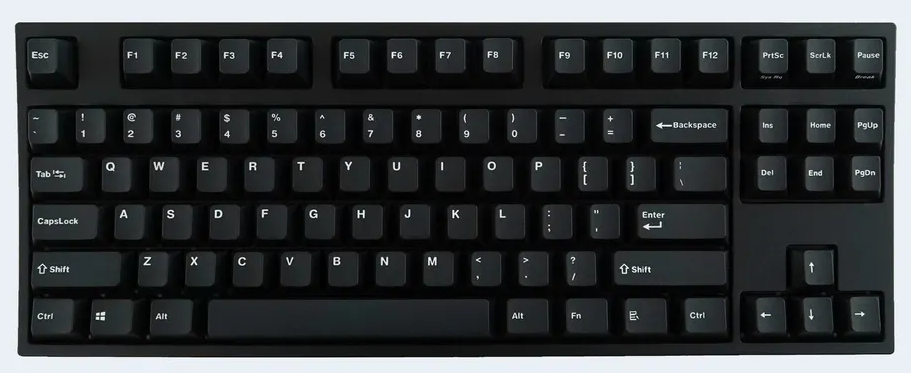
It was definitely a change not having the full 104-keys available including the numpad, but I liked the reduced footprint at my desk. The keys were still quite loud, and it was a bit annoying that the keyboard used a USB Mini Type-B connector and not something more modern. It’s a solid plastic case with a steel plate, feels solid and very well made, but has no fancy bells and whistles.
For work, I was using a generic HP/Dell/Lenovo keyboard for a while. When I switched to a new role, I was able to purchase and expense some hardware for my office, so I ordered a Logitech MX Mechanical Wireless Keyboard (Mac Version), as I was coding on a Macbook Pro.
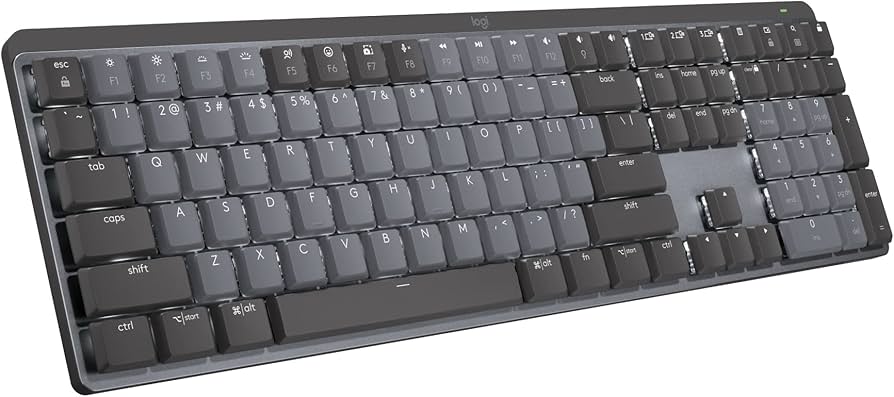
Although it was a decent typing experience, it is very proprietary, and Logitech doesn’t provide replacement parts or keycaps to switch between Mac and Windows (or Linux). Their software is also very proprietary. Step up your game Logitech!
As we are moving into an era where we are likely going to be hybrid in-office, if I want to use a decent keyboard at work, I’ll need something smaller that can fit in my backpack, but also quiet enough not to disturb my co-workers.
Inspiration and Motivation
A few months ago, a connection of mine on LinkedIn who works at Cisco (Ericka Dietrick) posted a video of herself building her own mechanical keyboard. I had never done it, and was interested, so I started doing some research on how to choose and customize parts. I had looked at a bunch of different brands like Keychron, Epomaker, and Wooting. I also watched a lot of YouTube videos on keyboards, and started getting some entertaining results, especially from a channel called Hipyo Tech (Howdy Hey). A couple of months ago, he posted a video that basically covered what I was looking for:
The main reasons I chose this keyboard was because I wanted a cheaper option to experiment with. I had previously bought items from AliExpress so I was no stranger to how the site worked, and the combination of components to make a near silent keyboard appealed to me. The specific keyboard also looked interesting because it had VIA Support, which would allow me to configure the keyboard without any dubious third party software. The smaller GMK67 model does NOT have VIA Support at this time, and has some other issues that Hipyo Tech’s video outlined.
The Parts
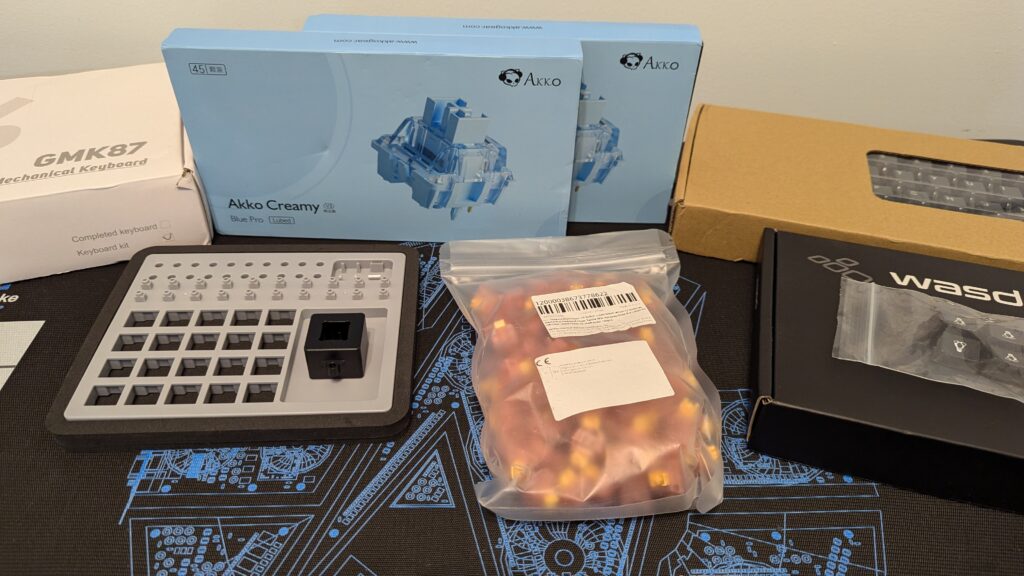
I purchased the majority of parts from AliExpress including:
- Zuoya GMK87 Mechanical Keyboard Kit (barebones)
- GMK (Clone) Double-Shot Keycaps
- Womier 189 Key PBT Double-Shot Black Grey Keycaps
- Keycap Puller, Switch Puller, and Lubrication Brushes
- Outemu Silent Peach V3 Switches
- Keycap Switch and Lube Station
- Metal Switch Opener
I wasn’t sure I would need all of the tools, but I figured I would get some just in case.
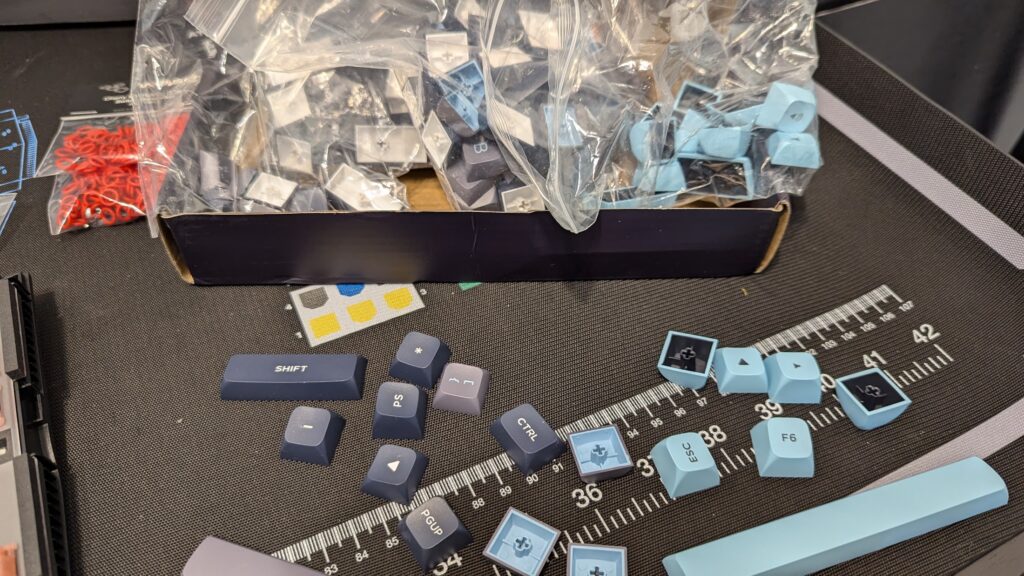
Of all the keycap sets, I was rather disappointed by the Womier set. I had heard good things about Womier, but the keycaps came loose in bags inside the box, rather than in cardboard or plastic rows, which usually help prevent the keycaps from rubbing against each other. I’ll hang onto these to try later.
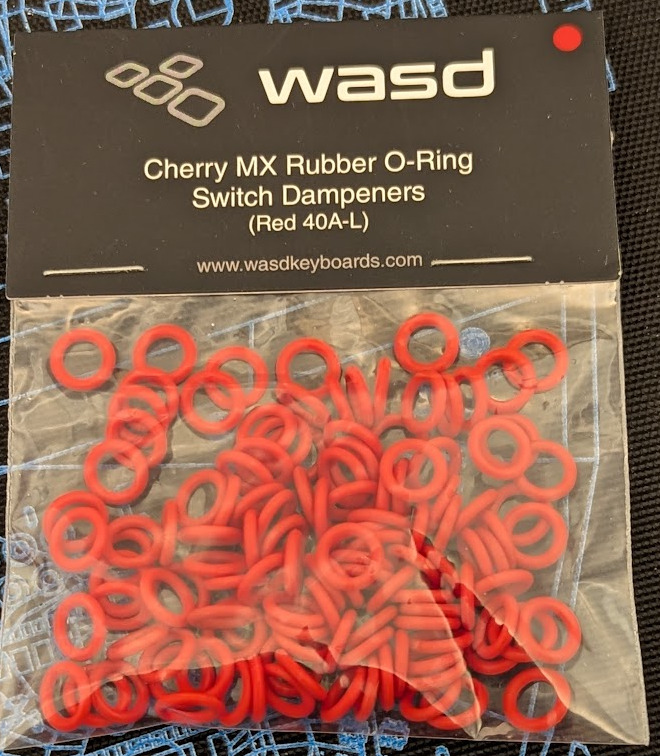
I also picked up some parts from WASD Keyboards, including Cherry MX Rubber O-Ring Switch Dampeners to help reduce the sound from the keys being pressed. I picked up some custom Linux OS keys, hoping I could replace my Code/Super/Windows keys on my keyboards, but I didn’t realize there are different keycap profiles. The main being Cherry Profile, OEM Profile, and SA Profile (Spherical All). This article from Das Keyboard explains the differences – so make sure you purchase keycaps that are of a consistent profile.
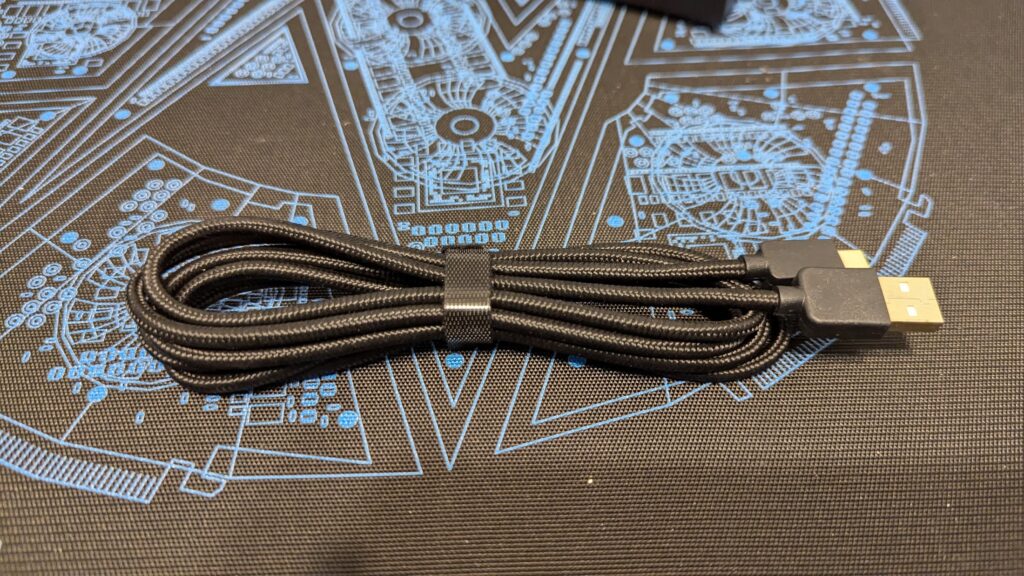
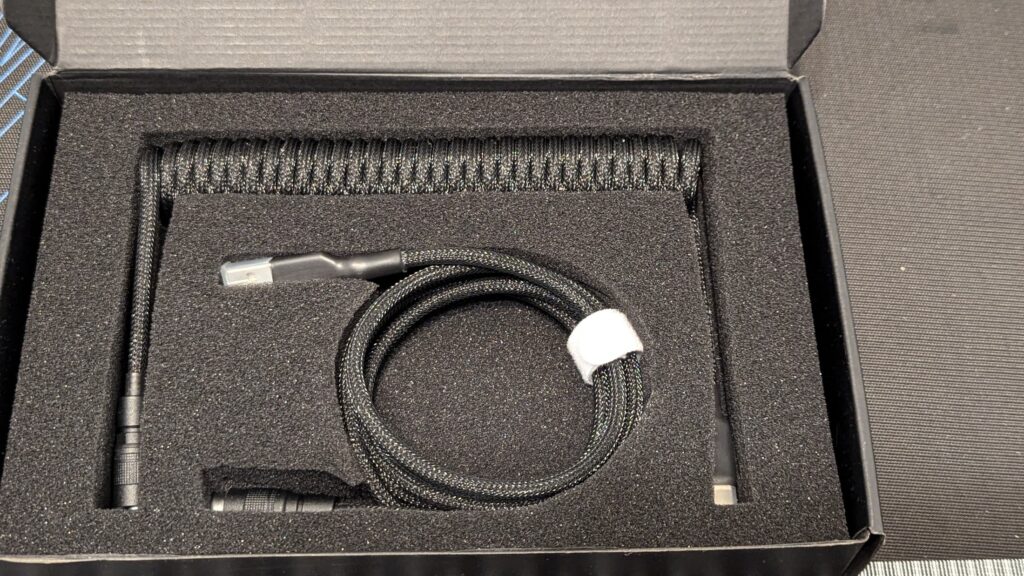
While the keyboard comes with a decent braided USB-C cable, I had ordered a coiled cable with a YC8 quick disconnect from Drop.com to be extra fancy.
I had also found and purchased a set of brand new Akko Creamy Blue Pro switches on Facebook Marketplace, but after comparing, the Outemu Silent Peach V3 Switches were quieter, so I went with those.
I also purchased some Krytox GPL 205g0 Switch Lube from Keyspresso, as well as a finer lubrication brush, in case I needed to apply extra lube to the keyboard switches or stabilizers.
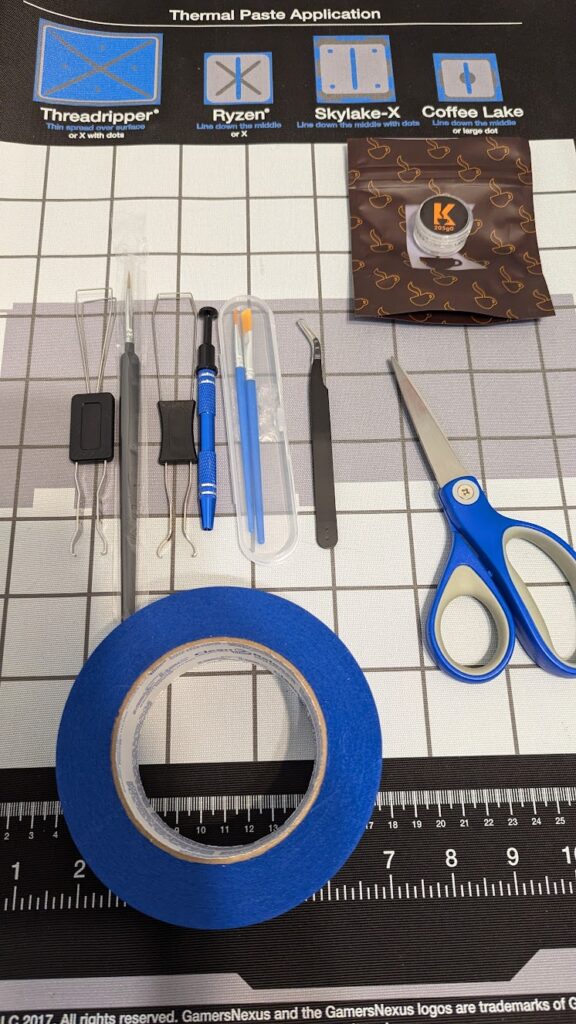
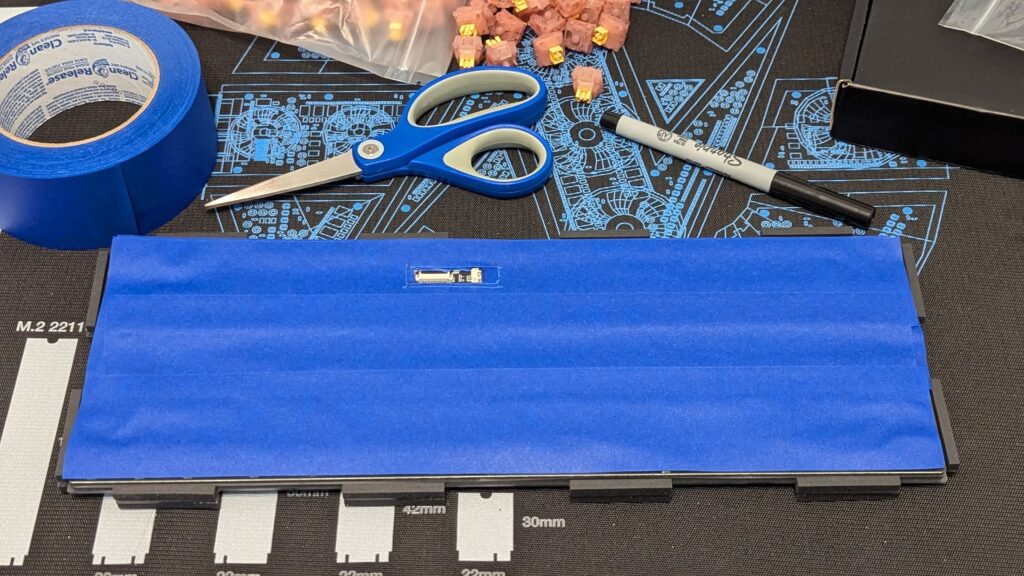
Along with some blue painters tape, an iFixit Toolkit, and a sharp knife, I was good to get started. I did all of the work on my Gamers Nexus Modmat.
Assembly
The first thing I did was take the keyboard apart. The knob pulls right off, and the top plate of the keyboard is held on with clips. I used the iFixit metal knife to slide along the seam to pop the clips. This can be done with a card or pry tool as well. Once I had it open, I detached the power and data cables, and pulled off the foam layers so I could work right with the PCB:
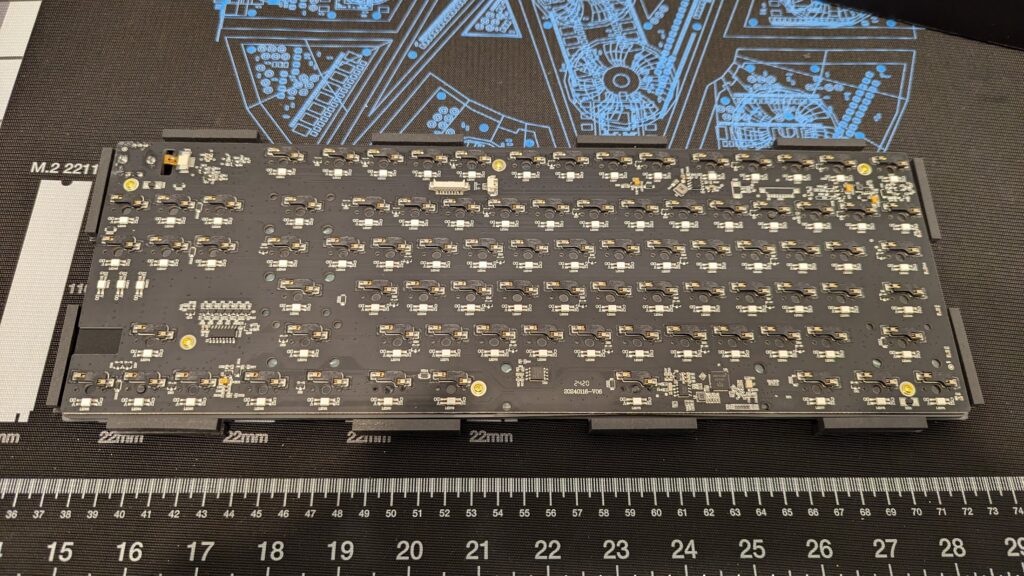
I did a “Tape Mod” (or Tempest Mod) to the back of the PCB, putting down about 4 layers of blue painters tape. I used a Sharpie to mark the corners where the plugs were, and cut out a hole in each layer with my knife:
Once this was ready, I reconnected everything onto the bottom plate. I didn’t feel the need to add extra foam, as the silicone on the bottom, as well as the foam would be fairly good at keeping the keyboard quiet. Because the case is plastic and not aluminium, there shouldn’t be any metal ping noise, so I didn’t see the need to do a force break mod. The edges of the case also had foam already, which made this unnecessary.
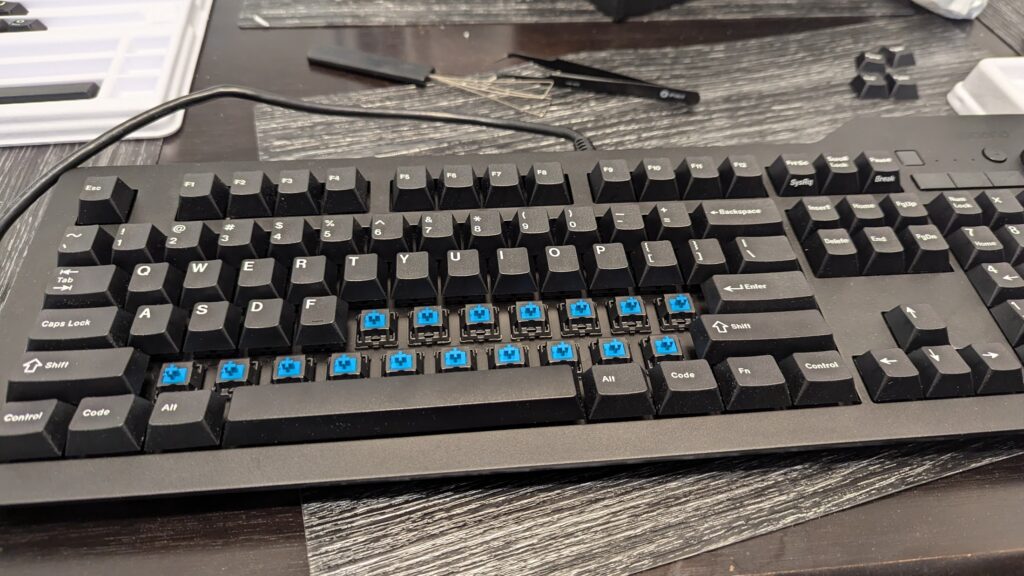
I added all of the switches to the keyboard, making sure that the pins on each switch were straight, and pushed firmly down with my thumb. The keyboard does not have pre-cut holes for the switches in the poron layer, but it does have south-facing LEDs. You need to look for the clear LED bar on the switches to orient them before pushing them down.
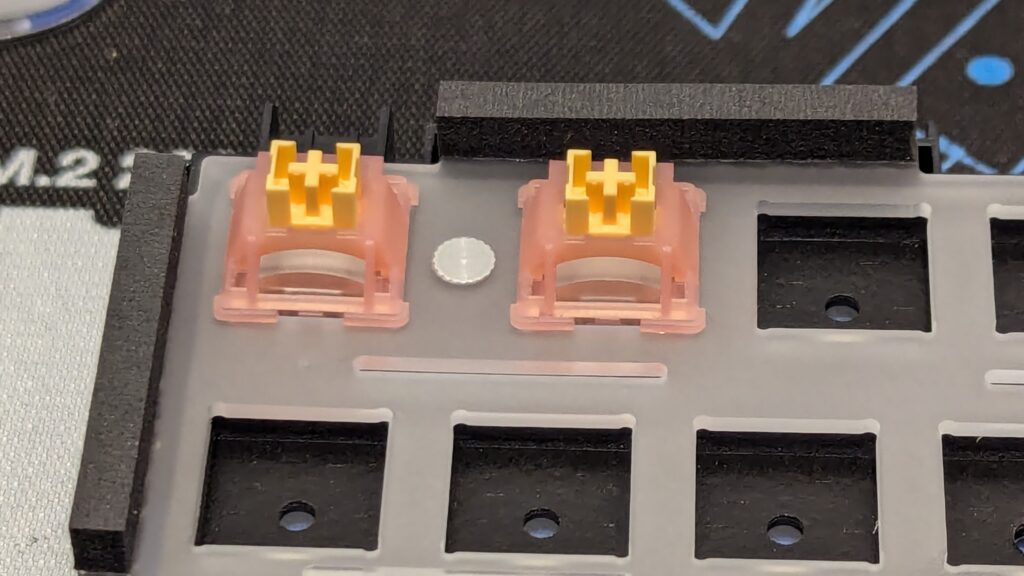
I did find a couple of switches with bent pins, but these were easily straightened with tweezers. Once the switches were all installed, I did a quick inspection:
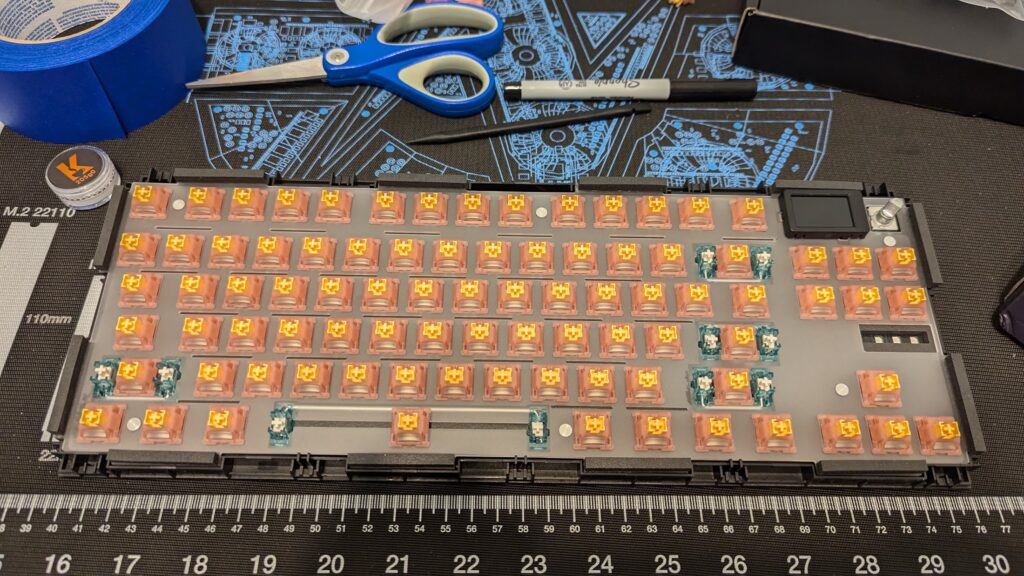
I took apart one of the switches, and I could see quite a bit of lube in them from the factory, so I didn’t feel the need to manually lube each of them. The stabilizers were factory lubed as well, and I could see large globs inside, so I used a brush to even them out and distribute them on all sides of the metal bars:

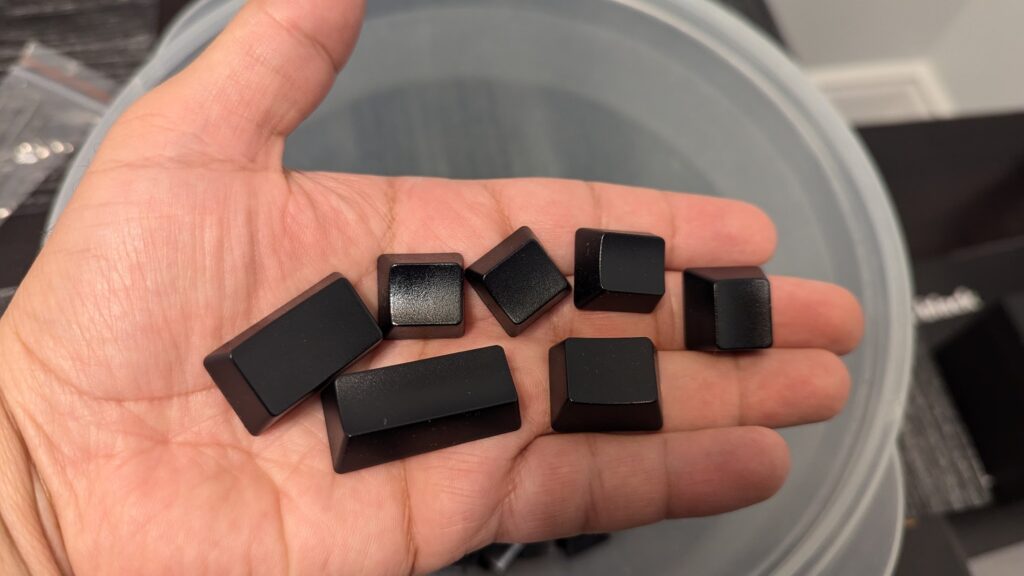
Once everything was ready, I started putting on the keycaps. I added one of the red dampener rings to the bottom of each keycap, so they would dampen the noise and reduce travel when the keys were pressed. I tried to add ones to the stabilizer connector, but it would prevent the key from pressing down properly, so each key only got one dampener ring.
I got a bit confused as the keycap set had multiple keys of different profiles, as well as keys for alternative layouts (ANSI vs ISO). I kept looking online for an example of the key layout, but it turns out the legend is on the back of the box!
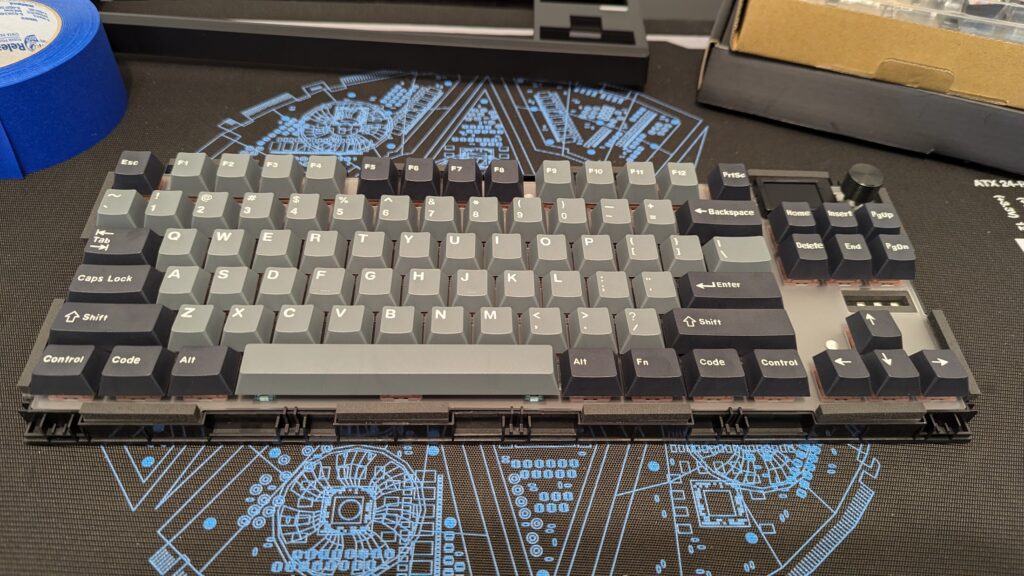
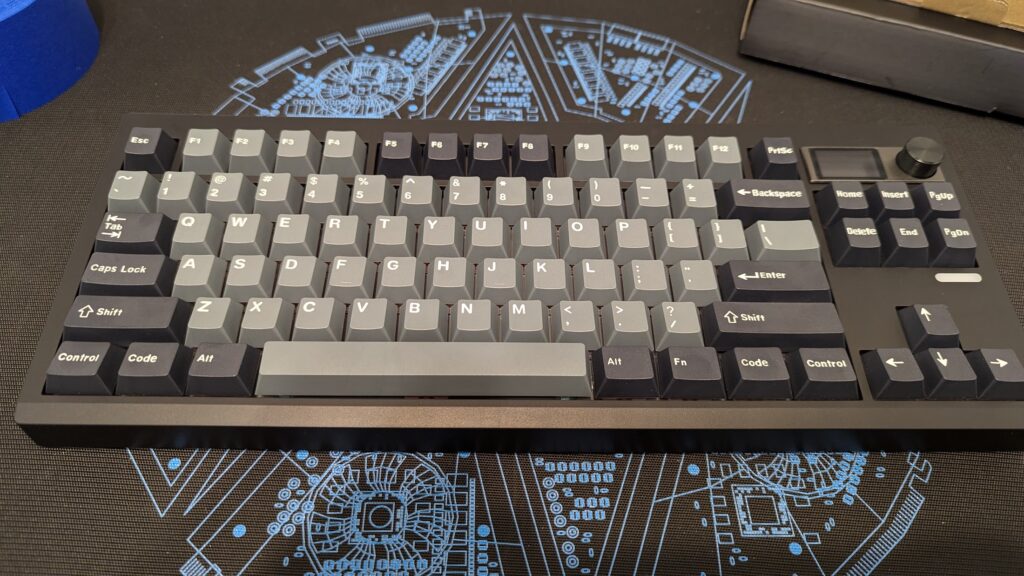
Once I had the keycaps installed, I reinstalled the top plate and knob, and tested it out. Here is a comparison of my old and new keyboard, showing the sound profile between Cherry MX Blue and Peach Silent v3 Switches:
I did find one switch that I had bent a pin and did not detect key presses properly. A quick keycap pull and switch swap, and everything worked perfectly.
Software Tools
As previously mentioned, the GMK 87 board is VIA Compatible:

VIA is an open specification, which allows you to modify your keyboard without needing third party software from the keyboard manufacturer or vendor. VIA works by communicating with the firmware that is running on the device and sending it commands across USB. This allows you to remap keys, add layers, create macros, and more.
Along with QMK open-source firmware, this gives you full control and customization over your keyboard. Note that not all VIA compatible keyboards use QMK firmware – in fact, the GMK87 does not. While you can download and install VIA onto your OS, you can also interact with your keyboard over the web interface hosted at usevia.app. The VIA website has a page for firmware, but based on this Github issue, I don’t see an official firmware update yet.
I found this video on upgrading the GMK87 firmware, and the poster is one of the mods on /r/budgetkeebs. I borrowed a Windows laptop and loaded the firmware, and also used the image uploader to sync the time on the keyboard screen, and I uploaded a Nyancat GIF as a test. The firmware update mainly fixes mode switching errors (having to change from Mac to Windows mode), but it also fixed my side LED, which now works:
The website also has a key tester, so you can hit each key on the keyboard, and it will light up if it registers a keypress. This is a quick way to verify that you don’t have any defective switches.

The RGB profile on the keyboard is managed using key combination presses, which are in the user manual. Alternatively, I will be using OpenRGB on my Linux machine to change the profiles.
Conclusion
I’m looking forward to testing out this keyboard more, and potentially bringing it with me to the office to use. I have a lot of extra parts, so I’ll probably be looking to build a couple of other keyboards for different purposes. I may try to build a low profile keyboard to be more compact, and I also want to build a 60% keyboard for coding, to force me to use Vim keybindings instead of using the arrow keys.
For gaming, I may check out one of the Wooting keyboards. They’ve been leading the way with magnetic “Hall-Effect” switches, and software like Rapid Trigger:
If you play competitive FPS games, definitely check these out. It’s been a bit of an arms race between Wooting and Razer, to the point where Valve banned some of the software from being used in their games, because it introduced so much of a competitive advantage.
They also have amazing support for their keyboards years after launch, and they support Linux using their Wootility Application both natively and via the web browser. They’ve also been amazingly transparent about their manufacturing process and order status, parts, and technology on their YouTube channel, and I really appreciate this.
Please leave me a comment if you enjoy seeing hardware related articles like this, or if there are different types of content you’d be interested in me going into more detail on.
Resources
- MechanicalKeyboards.com
- Reddit /r/mechanicalkeyboards
- YouTube – HipyoTech
- YouTube – Switch and Click
- Switch and Click – Keyboard Sizes Explained
- Switch and Click – ANSI vs ISO Explained
- Das Keyboard – Keycap Profiles
- VIA Keyboard Specification
- VIA Github Page
- Use VIA Web Application
- YouTube – Optimum – Wooting responds to Razer’s Cheating Keyboard
Photos


![]()